A home addition begins with planning: define purpose, size, and site constraints, then create schematic designs. Choose materials and fixtures for durability and lead time, and hire experienced designers or contractors. Obtain building, plumbing, electrical and HVAC permits before work starts. Prepare site and foundation, frame and roof the structure, and complete utility rough‑ins with inspections. Finish interiors, install fixtures, and perform final inspections and walkthrough. Follow post‑completion maintenance guidance and continue for detailed stage‑by‑stage guidance.
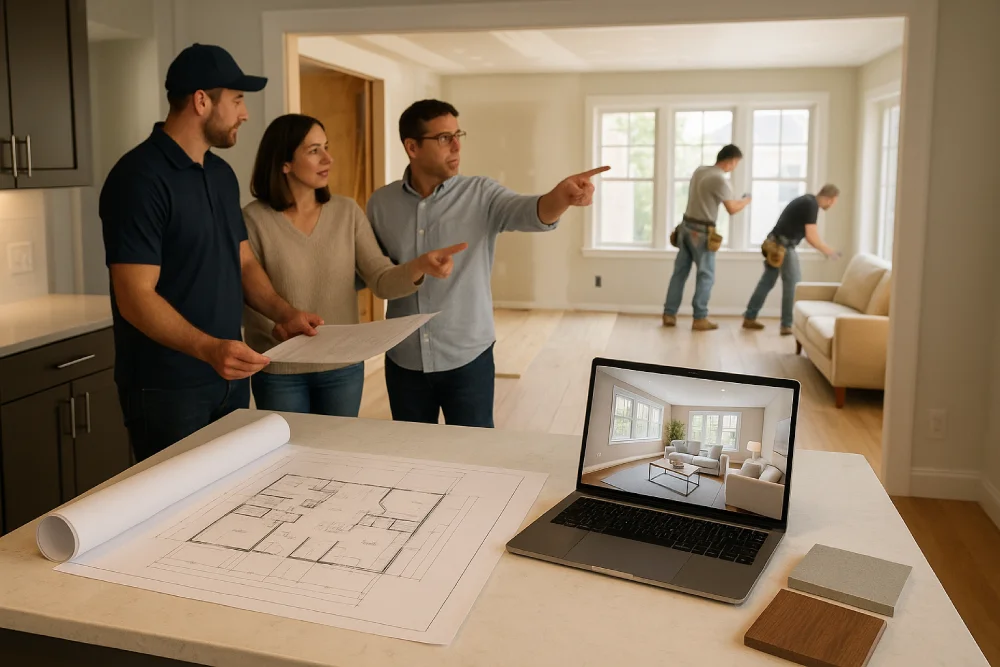
A clear plan begins the addition process and sets the project's direction. The initial planning and design phase clarifies goals such as extra living space, a bedroom, or a home office. It assesses how the new space will integrate with the existing structure and notes any limitations. Preliminary planning reflects size and complexity, and includes a contingency of 10–20%. Site evaluation checks soil, grading, drainage, zoning, and setbacks. Inspectors identify challenges like tree removal or utility relocation and any preservation restrictions. Early design work produces schematic layouts showing flow, light, and function while considering load-bearing walls and foundation needs. Permit requirements and timelines are reviewed. Professional coordination and planning considerations are factored in before detailed design begins. Be sure to outline goals for how the space will be used.
Material choices should balance durability for the local climate with clear planning requirements so that long-term performance aligns with project goals. Fixtures must be selected for style, efficiency, and compatibility with plumbing and electrical systems, and procured on a schedule that matches construction stages to prevent delays. Design partners are chosen for relevant experience, verified past work, and clear communication about materials, timelines, and coordination requirements.
Several key choices determine how long an addition will last and how much coordination it will require over time. Material selection affects durability and lifecycle planning. Steel and concrete offer superior strength; steel resists corrosion and concrete withstands wind, fire, and insects. Roofing options vary: metal, tile, and slate typically last 50–100 years but require more upfront coordination; composition shingles typically last 15–30 years and require less upfront coordination. Vinyl siding and window frames, common since the 1970s, can improve exterior longevity. Wood trim is susceptible to rot, affecting roughly one-quarter of homes. Modular construction often delivers consistent quality, energy efficiency, and faster build times, reducing coordination complexity. A reputable custom home construction company will help you compare upfront requirements with maintenance, energy considerations, and expected service life — ensuring material choices align with both budget and long-term performance.Choose design partners experienced with durable, efficient materials. Builders and designers should also inform clients about reasonable durability, performance, maintenance, and operation expectations, helping set maintenance expectations.
After choosing durable building materials and setting planning parameters, attention turns to selecting fixtures and scheduling their procurement. Fixture choices typically occur during the 4–8 week design and planning stage and include lighting, plumbing fixtures, cabinetry hardware, and appliances. A selection coordinator aligns choices with the design and timeline. Custom or special-order items have longer lead times and should be ordered early to avoid delays. Selections happen before permits and site prep so long-lead materials arrive on schedule. Fixtures must be compatible with materials and meet code and structural limits to prevent changes. Contractors and designers track supplier availability and suggest alternatives when supply issues arise. Early decisions and clear communication keep construction sequencing and planning on track. Construction timelines vary based on scope, complexity, and supply-chain issues, so plan accordingly for timeline variability.
Choosing the right design partners and contractors sets the foundation for a successful home addition. Selection begins with interviewing at least three candidates to compare viewpoints, experience, and communication style. Prefer firms that combine design skill with project coordination — a hallmark of design-build services — to enable value engineering and fewer surprises. Early engagement of contractors, builders, and material suppliers promotes coordinated decisions and realistic schedules. Verify licenses, portfolios, references, and how past teams handled unexpected challenges.
Clear contracts and proven collaboration reduce risk and keep projects on track.
Maneuvering permits and approvals requires early, organized action because local rules govern what can be built and how work must proceed. The municipal building department issues a general construction permit for any addition, and separate permits often cover plumbing, electrical, and HVAC. Applications demand plans, property details, and code compliance statements; straightforward cases may be approved in days, complex reviews take longer. Zoning laws control setbacks, height, and use; accessory structure permits and historic district reviews add steps. Permit requirements vary by scope and location. Work must not begin until permits are issued to avoid fines or stop-work orders. Owners should verify local ordinances online and coordinate required commission approvals before filing.
The site is cleared of vegetation, debris, and any old structures within the addition footprint to create safe, level access for equipment and materials. Grading follows, adjusting elevations and compacting soil to direct water away from the planned foundation and meet engineering specifications. Excavation and footing installation proceed based on soil tests and plans, with waterproofing, drainage measures, and utility stub-outs placed before inspections confirm compliance.
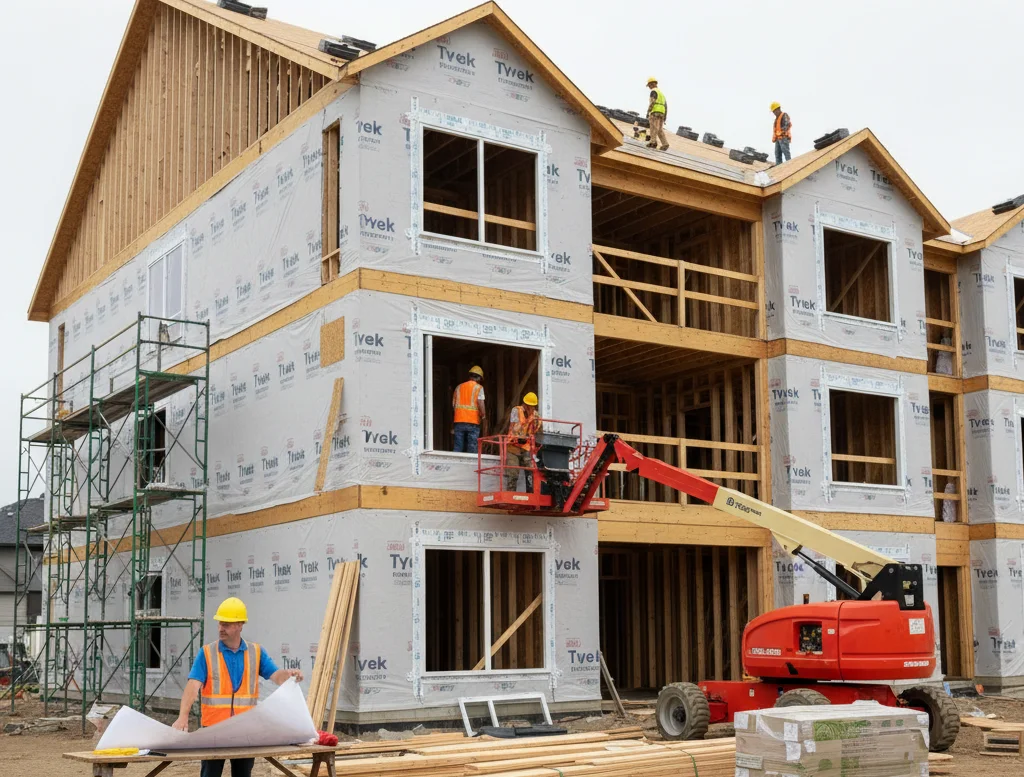
Before ground is broken, a careful clearing and grading process prepares the site and sets the foundation for a durable addition. Professionals begin with surveys to map elevation, drainage and setbacks. Vegetation, stumps and debris are cleared or removed, with sensitive areas handled by hand when required. Earthmoving follows: cutting lowers high spots, filling raises low areas, and laser-guided grading establishes precise slopes. Soil tests inform compaction needs and detect problematic soils. Drainage features such as swales or underground drains are placed so water moves away from the building. Key actions include:
When the site is ready, foundation installation establishes the stable base that ties a new addition to an existing structure. Layout begins with stakes and string to mark the perimeter, using the 3-4-5 triangle to square corners and aligning at the junction with the existing foundation. Trenches are excavated to code depth and below the frost line where required, with loose material removed for a solid base. Rebar placed per engineering plans is secured in trenches and doweled into drilled holes in the existing wall, often using epoxy for anchorage. Concrete is poured continuously, vibrated to remove air, screeded, and kept moist to cure. After waterproofing and inspection, backfill proceeds and the foundation is readied for framing.
Although often visible only after completion, framing and roofing form the structural backbone of a home addition and must be executed with precision. Framing begins by measuring and cutting top and bottom plates and studs to exact lengths, laying out stud positions typically at 16-inch centers, and assembling frames flat before raising them plumb and square. Roof framing uses rafters, ridge boards, collar ties, and ceiling joists or trusses to form a stable skeleton. Sheathing adds rigidity and a base for exterior finishes, while metal straps and diagonal braces increase resistance to wind and seismic forces. Critical material choices and connectors prevent moisture damage and sagging. Key focus areas include:
Framing and roofing set the physical shape of the addition, and the next step is to install the systems that make the space usable: water, sewer, gas, HVAC, and electricity. Utility crews first mark underground lines and the site is cleared for safe access. Excavation follows with trenches sized to code; soil type dictates equipment and time. Installation order usually places sewer and gas lines first, then HVAC and plumbing, with electrical last after the structure is weather-tight. Connections are pressure- and leak-tested; backflow preventers protect drinking water. Inspectors verify code compliance before activation. Trenches are backfilled in compacted layers, graded to drain away from the foundation. Permits, detailed utility plans, and contingency planning are essential for coordination and timely inspections.
A focused finish stage converts a bare addition into a functional, comfortable space by installing drywall, paint, flooring, trim, and fixtures in a coordinated sequence. Planning considerations guide choices: drywall, paint, hardwood, laminate, tile, and trim all require different coordination requirements. High-end items like marble or custom cabinets require additional planning, often representing a significant portion of interior coordination. Fixture selection—lighting, baths, kitchens, doors, windows—strongly affects planning requirements and long-term value. Quality control uses scheduled inspections, skilled installers, and material checks on delivery to avoid rework. Sequencing places drywall and paint before flooring and trim, with fixtures installed last. Clear contractor-designer-homeowner coordination minimizes delays and scope changes.
Once interior finishes, fixtures, and quality checks are complete, the project moves to the final walkthrough and move-in phase where the owner verifies workmanship and system function before taking possession. The owner should allocate at least 60 minutes, bring the contract, inspection summary, and repair agreements, and involve an agent or handyman. Verify all agreed repairs, test switches, faucets, doors, and HVAC, and request receipts or warranties. Operate major appliances, run faucets, flush toilets, and test outlets and sump pumps. Inspect interior and exterior for new damage, incomplete work, or debris. Confirm possession date, keys, and codes. Document unresolved items and negotiate remediation. Transfer utilities, use warranties for post-move repairs, and schedule a post-move inspection to catch latent defects.
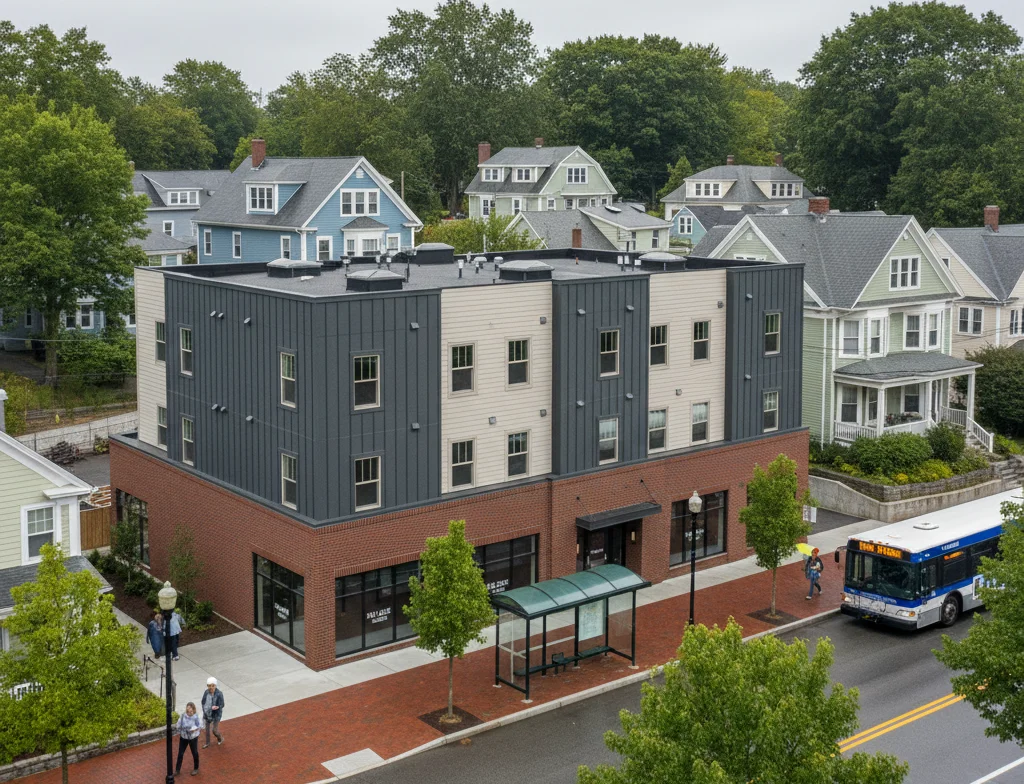
The home addition process concludes with a clear handoff from builder to owner. All systems are tested, inspections passed, and punch-list items addressed. The owner receives warranties, as-built documents, and maintenance guidance. Proper documentation and a final walkthrough reduce future disputes and simplify upkeep. With permits closed and utilities settled, the new space is ready for use. Ongoing care and timely repairs preserve value and ensure the addition functions as intended.
Before building a home addition, it's critical to define your goals, planning requirements, and site constraints. Consider whether you need more living space without moving, an extra room like a bedroom or office, or improvements to your current home. A design consultation early in the process helps identify zoning limits, structural needs, and realistic planning requirements. With the right contractor, you'll reduce delays and avoid surprises.
The decision between a remodel and an addition depends on your goals. A remodel refreshes existing rooms, while building an addition increases the square footage of your current house. Many homeowners consider an addition when they need more floor space but want to avoid the complexity of moving. Both options can increase the value of the home, but additions usually provide different benefits when well-integrated.
Every home addition project must comply with local building codes and zoning in Massachusetts, which regulate setbacks, height, and structural safety. Depending on the scope, you'll need permits for construction, plumbing, electrical, and HVAC. Skipping approvals can result in fines or even stop-work orders. A builder-led, design build firm coordinates code compliance well in advance so construction moves smoothly.
When thoughtfully planned, an addition can significantly increase the value of the home. Whether it's an extra room, expanded living rooms, or a new kitchen or bathroom, additions are a solution for growing families. Well-executed projects that blend seamlessly with the current home often provide strong value. While planning requirements vary, additions can yield strong returns, especially compared to the complexity of moving.
The first step is to schedule a consultation with a trusted design-build team. During this design consultation, the contractor will help you determine the scope, planning requirements, and feasibility of your addition project. From there, the construction process moves through design, permitting, site prep, framing, and finishes until the addition is completed. With the right partner, transforming your home requires proper planning and coordination to create your ideal space.
© 2025 Genesis Construction and Development - All rights reserved | Web Design & SEO By: Authority Solutions®