Start by matching scale and proportion so the addition does not overpower the original footprint. A custom home design build approach ensures that architectural plans and construction execution stay aligned from the start. Align roof pitch, eave heights, and major roof planes for a continuous silhouette. Use identical or closely matched siding, trim, and window profiles, and test paint samples against existing weathering. Continue interior elements like floor level, trim profiles, and hardware to avoid abrupt transitions. Confirm setbacks, utilities, and FAR with a professional early. Keep these steps in mind to learn practical implementation details.
When planning a home addition, begin by assessing proportion and scale to guarantee the new work fits the existing house and lot. A balanced addition matches its size to the house and property. Calculate Floor Area Ratio (FAR) — the home’s square footage divided by lot size — to avoid oversized expansions. Check setbacks and zoning to determine allowable placement and dimensions. Measure the existing footprint from a plat of survey and note utilities that limit expansion. Respect the original massing so the addition does not dominate visually. Align window and door sizes, cornice lines, floor heights, and materials for visual continuity. Size interior rooms and circulation to match existing proportions. Consider outdoor space and maintenance when deciding overall scale. Consult a professional early to confirm feasibility and navigate municipal requirements. Consult a qualified custom home contractor early to confirm feasibility and navigate municipal requirements — especially when the addition must match an older home's unique proportions and materials.
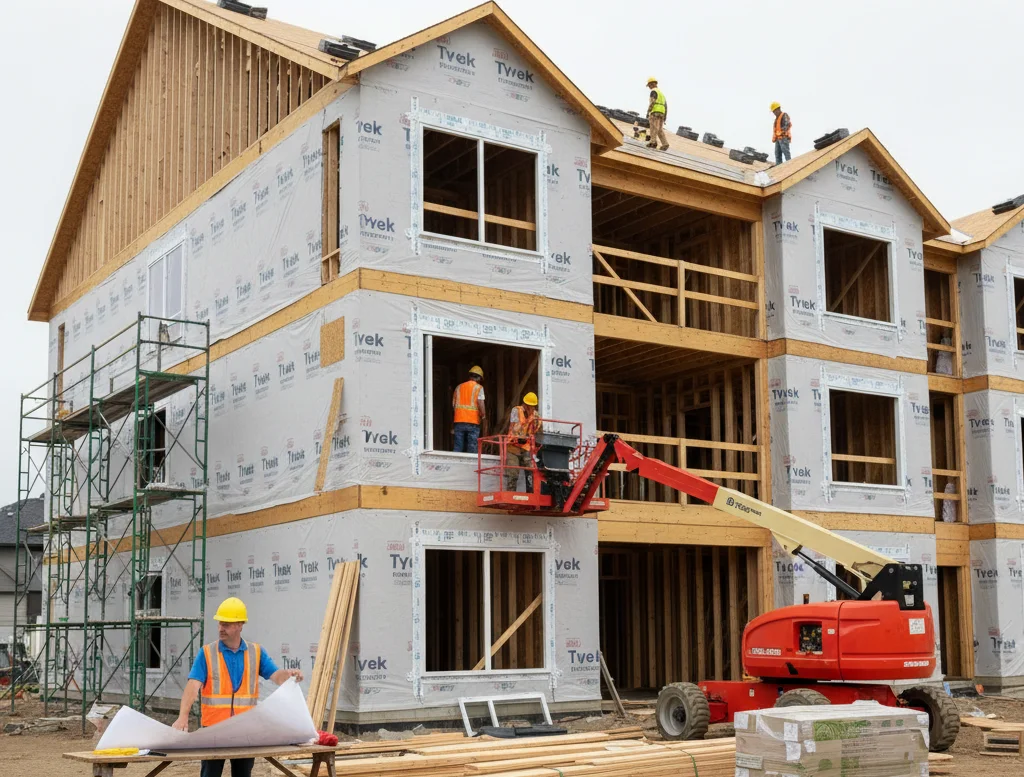
When adding new space, matching the roof pitch of the addition to the existing slope prevents visual mismatch and helps maintain proper drainage and load distribution. Aligning eave heights and overhang dimensions creates a continuous silhouette and avoids awkward breaks where the two structures meet. Where possible, continue primary roof planes across the junction or design smooth transitions so ridge lines and valleys shed water efficiently and appear intentional. Working with an experienced design-build company brings professional guidance to ensure the addition integrates structurally and aesthetically.
How steep should the new roof be to make the addition look like part of the original house? The new roof should match the existing pitch—rise over run—so lines and proportions read as one structure. Measure the existing pitch by checking vertical rise over a 12-inch horizontal run. Matching pitch preserves drainage and visual continuity. If ridgelines meet, align heights or design compatible transitions.
Careful planning and precise framing reduce the appearance of a separate addition. Also account for regional weathering factors like UV fading when selecting materials to better match the existing roof.
Matching the roof pitch sets the overall silhouette, but the eaves and overhangs determine how the two sections read at eye level. The addition should match eave height, depth, fascia profile, soffit materials, and drip edge style. Framing must tie into existing ledger boards using similar lumber sizes and spacing. Fasteners and flashing should match corrosion resistance and installation method. Air and vapor barriers, insulation, and ventilation need continuous runs through the junction. Precise alignment and consistent materials guarantee both function and appearance remain unified. For durability in high winds, extend overhang framing with properly sized outlookers or outriggers to provide additional uplift resistance outrigger framing.
| Element | Action |
| Eave height | Match exactly |
| Overhang depth | Duplicate shadow line |
| Fascia/soffit | Same profile/finish |
| Framing | Same sizes/spacing |
| Sealing | Continuous barriers and flashing |
Because rooflines read as one continuous plane to the eye, extending existing roof planes over an addition is the fastest way to avoid a patched-on look. Extending the ridge and matching pitch produces a natural flow and aids water shedding. Structural review guarantees loads transfer safely and may allow rafter extensions to reuse existing supports. Valleys and intersections need precise framing and flashing to prevent leaks. Ventilation must be preserved when tying in new decking.
Carefully matching exterior finishes and materials is essential to a seamless home addition. The process begins with identifying primary facade materials—brick, wood siding, stucco, or stone—and documenting color, texture, and profile. Source identical materials when possible; specialty suppliers or custom fabrication may be required. If exact matches are unavailable or too costly, choose complementary materials that mimic visual and tactile qualities. Replicate trim, cornices, siding profiles, and other details to preserve consistency. Account for weathering on existing surfaces; faded siding or masonry may need refinishing or full repainting to achieve uniformity. Coordinate roof, window, and door materials and finishes so transitions read as one structure. Test paint samples and finish patches on-site before committing to large runs.
A careful inventory of a home's defining stylistic features guides every decision on an addition. Designers and builders should document exterior elements like roof pitch, window proportions, trim and decorative moldings, and interior details such as floor patterns, door profiles, and finishes. Those documented features should be echoed in scale, materials, and placement so the new work reads as a coherent extension rather than a separate element.
Several clear observations establish the stylistic baseline for any home addition. A methodical review identifies era, form, and key characteristics. Roof shape, pitch, and drainage patterns set structural cues. Exterior finishes and window/door types define visible language. Proportions and massing determine visual balance.
This focused inventory informs decisions that respect the house’s character while ensuring the addition reads as a coherent, intentional extension.
When an addition echoes both exterior and interior details, it reads as an intentional extension rather than an afterthought. The [DESIGNER] should match exterior materials—siding, brick, stone, or stucco—and use similar colors and textures to blend new work with the original facade. Replicate key flourishes such as moldings, cornices, window and door casings, and rooflines so profiles align. Maintain proportions by sizing windows, doors, and massing to the existing home and aligning ridgelines and setbacks. Inside, carry consistent trim, flooring, cabinetry, and fixture styles to create visual continuity. Coordinate roofing type, pitch, gutters, and eaves to mirror the house. When exact materials are unavailable, select close visual alternatives that preserve rhythm, scale, and the home's defining architectural character.
Ensuring smooth interior transitions requires deliberate repetition of structural and design elements so the addition reads as part of the original home. The planner should repeat door styles, trim profiles, and ceiling heights to avoid abrupt spatial shifts. A coordinated color strategy ties rooms together; limit the palette and repeat a base color for most surfaces. Flooring choices must align; continuous or closely matched materials create visual flow at thresholds. Small details finish the effect—matching hardware, consistent light fixtures, and similar window treatments communicate unity. Practical tactics include:
After establishing interior continuity through matched finishes and fixtures, attention shifts to planning materials and budget so the visual unity can be realized without financial surprises. The planner calculates core construction costs—framing, electrical, plumbing—and adds design fees, permits, and inspections. A contingency fund and early financing decisions prevent cash shortfalls. Material choices balance price, durability, and maintenance, noting that custom or imported items raise costs. Scope and complexity drive per‑square‑foot rates; structural changes and utility upgrades increase expenses. Procurement strategies include supplier comparison, checking in‑stock availability, and preferring standard sizes to cut waste. Labor for installation is included in estimates. Set an initial buffer of 10–20%, seek multiple bids, prioritize materials that affect both appearance and function, and update the budget regularly.
Although exterior additions can match a home's style on day one, long-term visual unity requires deliberate planning for weathering, color shifts, and material aging. The design team should select durable materials and protective coatings that resist UV, moisture, and temperature swings. Test patches reveal how finishes will fade under real light. Ventilation, flashing, and sealed joints prevent water damage that accelerates aging. Landscaping and drainage divert moisture and shield surfaces from wind and sun.
Weathering, color shifts, and material aging influence long-term appearance, but meeting codes and working with knowledgeable professionals determines whether an addition is safe, legal, and built to last. Homeowners should hire licensed designers or architects to create plans that balance structure and style. Contractors experienced with local practices implement those plans and coordinate trades. Structural engineers evaluate foundations and load-bearing changes. Interior designers preserve consistent finishes inside. Verify licenses, references, and past projects before hiring. Research zoning, setbacks, height limits, and historic-district rules early. Obtain required permits and schedule inspector visits during construction. Follow energy, fire-safety, accessibility, electrical, plumbing, and HVAC codes. Define scope, timeline, and budget in writing. Maintain clear communication and document approvals. Review insurance and tax implications prior to work.
A successful addition reads as part of the original home when proportion, materials, rooflines, and interior flow are treated as a single project. Careful measurement, accurate color and texture matching, and attention to how elements age keep the exterior unified over time. Respecting the house's architectural language and working with experienced designers, contractors, and local officials guarantees code compliance and practical buildability. Thoughtful planning and realistic budgeting produce an addition that feels intentional, balanced, and enduring.
A successful home addition seamlessly connects scale, materials, and details—the goal is to seamlessly blend proportions, roof pitch, and siding profiles to blend with your existing home and to flow seamlessly with your existing layout. Start by surveying the existing layout, rooflines, and elevations; then echo the existing architecture with disciplined architectural design that respects rhythm, window proportions, and the existing character. Carry the existing design inside by repeating the key design elements of your home—millwork, flooring, and hardware—so finishes complement your home’s existing palette and literally match your home’s existing trim. Align structure to your home’s existing bearing lines and respect the home’s existing structure so the addition should feel like it belongs. Thoughtful detailing—casing sizes, panel profiles, sheen levels—will make the addition feel consistent; the target is an addition feel that reads “like it was always there,” like a natural extension that visitors feel like a natural extension of daily living, where the transitions look intentional rather than stitched, delivering a refined home addition look that becomes a true part of your home and a seamless part of the house. Done right, the addition complements the whole and the continuity will ensure your home feels cohesive while you ensure that your addition performs and ages well—this is where professional craft and expertise in design really show.
Choose an integrated design build approach so one accountable team manages budget, drawings, and field execution; a strong partner can coordinate design and build tradeoffs early, which is why selecting a seasoned build firm and proven home builders matters. Early pricing against your home addition design keeps the home addition project on track—define the addition project scope, structural assumptions, and allowances before building an addition or committing to a home remodel that touches structure. Use practical design tips to right-size rooms and circulation, then lock finishes to reduce design complexity. Up front is when you address approvals, utilities, and neighbor sightlines; plan accordingly because the biggest challenges in home expansions often appear after framing if decisions drift. Remember, your existing home is crucial context for choices—door swings, stair placements, and floor heights—because whether your home is colonial, cape, or contemporary will set the language. Treat the work like a capital plan: your home is a significant investment, and a thoughtful scope is a home is an exciting opportunity to enhance daily life, expanding your home, adding space, and adding measured square footage to your home without visual compromise.
A second-story addition raises structural stakes and exterior continuity; when adding a second story or tying over a new garage, align ridge and eave heights so the silhouette reads as one and the water management is sound. Structural upgrades and stair placement guide circulation and daylight, and the right envelope details will help transitions disappear. Tie new rooms to existing space with matched ceiling heights and floor levels; mind door and trim profiles so existing space and the new are visually consistent. Plan connection points carefully so the space and the new addition don’t telegraph a seam; repeat flooring species and stain so you’re making your home addition feel continuous while making the new space useful. Program flex areas—nursery, guest suite, or home office—that work for your entire home and carry finishes throughout your home so you can comfortably live in your home during phases. Keep traffic paths aligned with the rest of your home and mirror casing heights with the rest of the house; a coherent scheme helps the addition must protect structure and aesthetics alike, and a disciplined envelope keeps weather out and comfort in.
Among the challenges in home expansions, scale and proportion are first: oversizing can dwarf the original, while undersizing wastes budget; add in permitting, hidden utilities, and neighbor views, and you see why challenges in home additions require early study. The biggest challenges in home tie-ins are structure, water, and material matching; a clear sequencing plan will help control risk. Resist shortcuts that prevent the addition from performing—continuous air, water, and vapor control layers are non-negotiable. Your addition must respect style cues so the addition feel like it belongs to the original, not just adjacent to it. To keep the addition look intentional rather than accidental, test colors on-site and order enough material from the same dye lot; small variances can telegraph at corners. Finally, budget time for long-lead items and plan accordingly; supply fluctuations and inspections can stretch schedules, but disciplined preparation keeps momentum.
Think about how old and new spaces meet at thresholds so rooms read like a natural extension and the addition must function as a daily backdrop, not a showpiece you tiptoe around. Use one lighting language and repeat metals and sheens; that consistency makes the addition feel like it belongs to your routines. Program circulation so new spaces with your existing rooms minimize dead-ends, and place storage where it serves both the space and the new addition. A clear palette that complements your home helps the addition feel like it was always there; carry color and trim throughout your home so the addition should feel like a quiet continuation, not a reset. If you’re expanding your home to carve out a mudroom or home office, make sure sightlines tie back into the rest of your home and that mechanicals are balanced so comfort matches the original. Above all, home addition must decisions anchor to longevity: materials that wear well, details that match your home’s existing profiles, and connections that complement your home’s existing structure; that discipline will ensure your addition and ultimately ensure your home ages gracefully as one coherent whole.
© 2025 Genesis Construction and Development - All rights reserved | Web Design & SEO By: Authority Solutions®