A remodel moves through clear stages: planning defines goals, budget, and timeline. Site assessment and measurements reveal site limits and hazards. Concept design tests layouts and gathers client feedback. Materials and fixture selections lock specifications, lead times, and allowances. Demolition and site prep protect structure and sort waste. Framing, then plumbing, electrical, and HVAC follow code and inspections. Finishes complete surfaces and systems. Final inspections and a handover confirm performance and close the project; continued sections explain each step in detail.
What should be accomplished before a single wall is moved? The project requires clearly documented goals that state functional needs, aesthetic aims, and any future lifestyle changes. A prioritized list separates essentials from preferences to guide decisions. A realistic budget follows, built from multiple written estimates and including materials, labor, permits, design fees, and contingencies. Financing options should be compared and cost priorities set to limit overruns. A detailed timeline breaks the work into phases—design, permitting, demolition, construction, finishing—with milestones for permits, structural work, and inspections, ensuring the project aligns with goals to build custom home standard. Buffers account for delays. Early consultations with designers and contractors confirm feasibility and code compliance. These preparations align expectations, control cost, and reduce the risk of rework. It is also important to ensure the renovation complies with building codes.
Before any demolition or design is finalized, a thorough site assessment and precise measurements must establish what the property can support and what work will be required. The team documents topography, soil, sunlight, vegetation, and sightlines to guide placement and costs. Structural inspections confirm load-bearing elements and reveal needed modifications. Hazard testing for asbestos, lead, moisture, or mold informs safety and schedules. Zoning and permit constraints are identified early to avoid redesigns. Accurate measurements, gathered with tape, laser scanners, or drones, produce verifiable records for bids and permits. Clear documentation links site realities to budgets and sequencing so contractors and regulators act from the same facts. For many projects, Timberlake Design/Build offers a complementary site analysis to confirm feasibility and provide an initial cost estimate.
| Item | Purpose | Typical Outcome |
| Topography | Buildability | Site grading need |
| Soil | Foundation design | Cost change |
| Structure | Safety | Retrofit plan |
| Hazards | Health/safety | Abatement scope |
| Zoning | Compliance | Permit path |
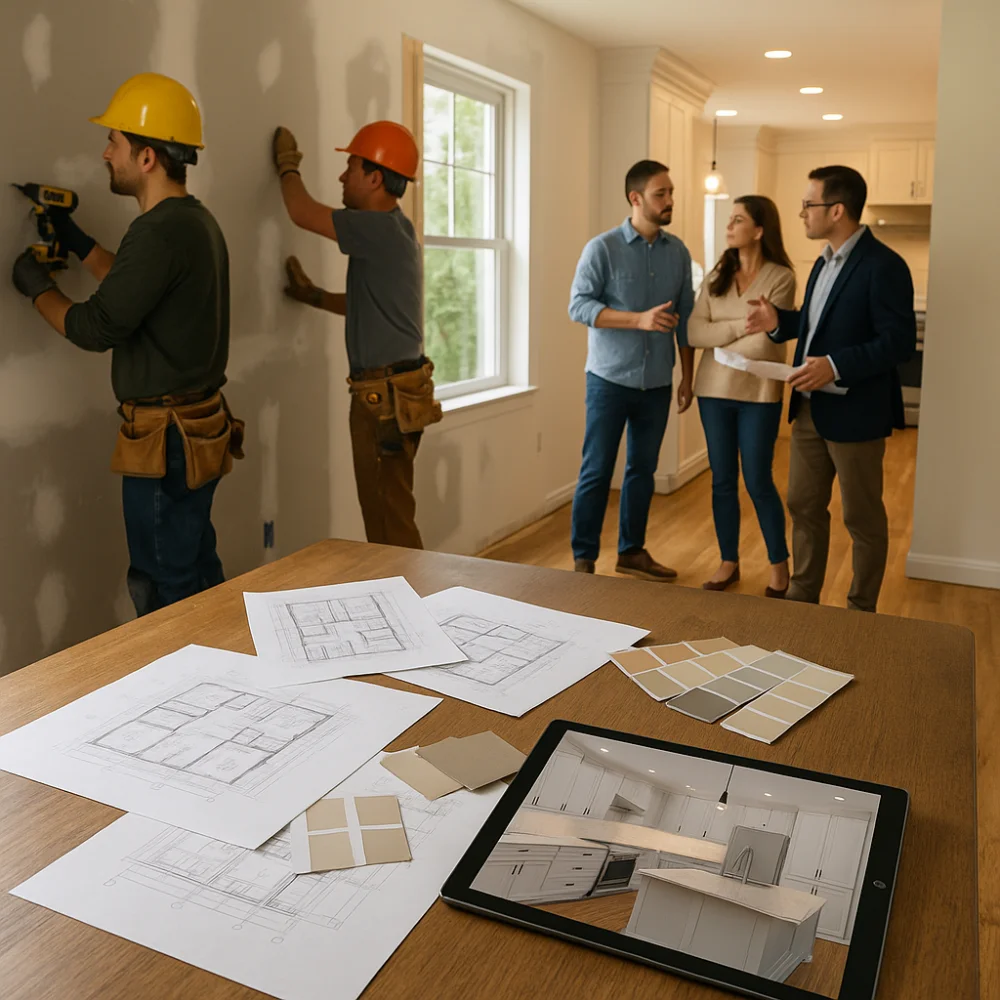
Initial concept sketches present multiple layout and style options to establish the project's direction and highlight key spatial decisions. These sketches are tested through recursive design revisions, where drawings and simple 3D views are adjusted based on client feedback, cost implications, and functional requirements. Clear versions of each revision are documented and shared so the design team and client can confirm choices before moving into detailed drawings. The process begins with a careful examination of the existing house, budget, and timeframe to ensure priorities are understood.
A few simple sketches often begin the conceptual design phase, converting client ideas into visible plans that guide the rest of the remodel. Initial concept sketches translate abstract goals into floor plans, elevations, and quick 3D views so everyone visualizes scope and style. Designers gather client needs, site measurements, and budget limits before sketching layout options. Early drawings reveal structural constraints, circulation paths, and opportunities for change. Clients review the visuals and offer focused feedback on function, materials, and priorities. Deliverables include schematic drawings, basic models, preliminary furniture placement, and a conceptual budget range. This stage aligns expectations, highlights potential construction issues, and provides the foundation for detailed design and cost planning, reducing surprises later in the project. The conceptual phase is also key for visualizing possibilities and making sure the project reflects the client's lifestyle and goals.
Several rounds of revision typically shape the conceptual design into a buildable plan. Iterative design development refines layout, materials, and structure through sketches and digital models. Designers integrate building codes and zoning while balancing creativity with budget and function. Client feedback guides adjustments to flow, finishes, and technology, often via 3D renders or virtual walkthroughs. Changes are tracked with versioned plans and evaluated for cost, schedule, and approvals. Collaboration between planners, engineers, and a general construction contractor keeps revisions coherent. Digital tools like BIM, VR, and cloud platforms speed review and reduce errors. Well-managed iterations cut costly on-site changes, improve satisfaction, and raise long-term value.
| Iteration Stage | Typical Output |
| Concept sketch | Layout ideas |
| Design revision | Detailed plans |
| Client review | Comments list |
| Final adjust | Construction set |
The team confirms durable materials first, matching product performance—such as water resistance or scratch resistance—to each room’s function and local climate. They then coordinate fixture styles, ensuring finishes, hardware, and lighting complement the chosen materials for a cohesive look. Finally, specifications are finalized in written schedules that list exact products, quantities, suppliers, lead times, and installation notes to control cost and prevent delays.
When finalizing materials, fixtures, and specifications, durability should guide decisions to minimize future repairs and preserve renovation value. The selection process weighs wear resistance, moisture tolerance, climate effects, and maintenance needs. Choices must match room function: kitchens and entryways need tougher surfaces; living areas can use engineered wood or quality carpet. Consider lifecycle costs, including sealing, repairs, and energy performance. Samples and early discussions help reconcile looks with long‑term performance.
A clear fixture plan anchors a successful remodel and keeps individual choices working together. Fixture style coordination aligns finishes, shapes, and scale with the overall design—modern, transitional, or traditional—so rooms feel cohesive. Designers recommend related finishes rather than exact matches to avoid a contrived look. Lighting should be planned from accents (lamps) to mains (ceiling fixtures), using shared elements like bulb type or metal tone to tie the scheme together. Balance function and form by choosing durable materials and easy-to-clean surfaces for high-use areas. Mixing finishes within a color family adds interest without chaos. Consider fixture scale in open plans and the project budget when selecting statement pieces. Early collaboration with designers or contractors simplifies coordination and reduces costly changes.
Following fixture style decisions, finalizing specifications centers on locking down the exact materials and fixtures that will be ordered and installed. The team converts design intent into actionable lists with precise manufacturers, model numbers, finishes, and installation notes. They check lead times, warranties, code compliance, and compatibility with mechanical systems. Documentation integrates with drawings and the construction schedule to prevent delays. Procurement responsibilities and inspection procedures are assigned before ordering.
One clear priority before any structural work begins is to make the demolition zone safe, empty, and documented. The team removes furnishings, secures utilities, and completes inspections for asbestos, lead, or mold. Permits are obtained and hazardous materials are handled by licensed professionals with containment and disposal records. Manual demolition clears nonstructural elements while protecting remaining finishes. PPE, barriers, and training enforce safety. Debris is sorted into recyclable, hazardous, and general waste. Certified carriers remove hazardous waste. After demolition, the site is cleaned, graded, and compacted as needed. A final inspection verifies the area is ready for framing. Clear records and strict procedures protect people, property, and compliance.
| Emotions | Details |
| Relief | Space cleared |
| Caution | Hazmat controls |
| Confidence | Permits secured |
| Order | Waste sorted |
| Readiness | Site inspected |
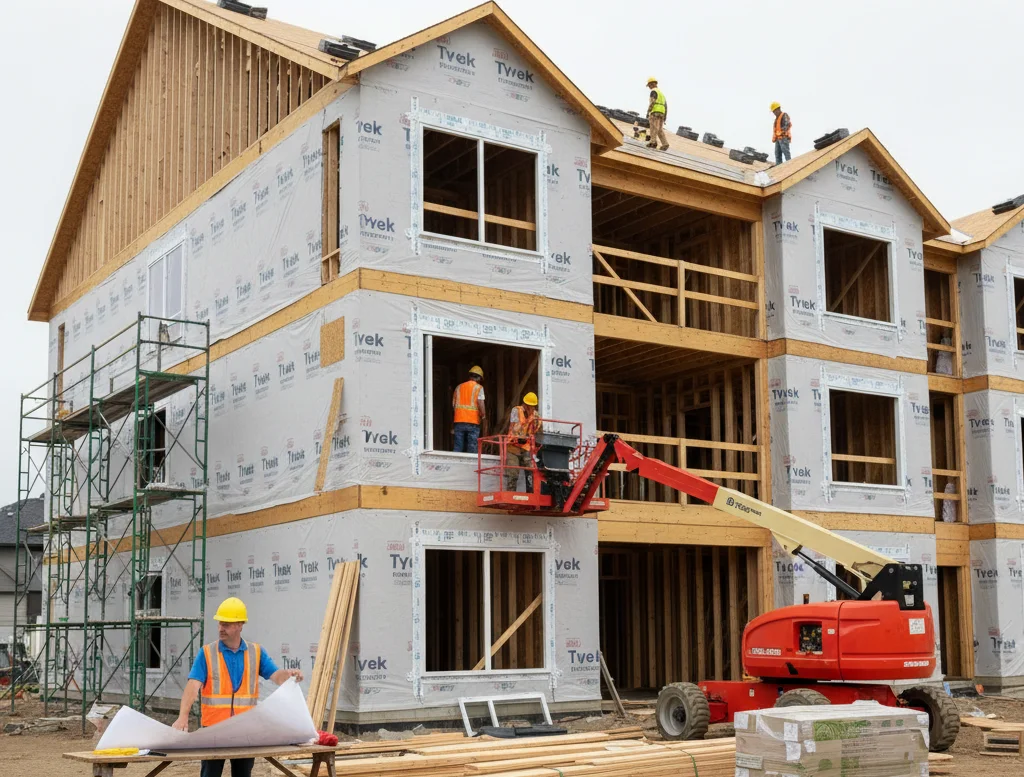
With the site cleared, graded, and verified, work moves into building the structure that will carry loads and define spaces. Framing begins with a careful review of designer and structural plans. Walls, openings, and plate lines are marked on the foundation or subfloor. Wall panels are assembled flat, then raised and secured. Floor framing uses sill plates anchored with bolts, joists at regular spacing, and plywood or OSB sheathing for a stable subfloor. Roof framing employs trusses or rafters, precise cutting, and bracing. Inspections confirm compliance and load calculations guide beam and joist sizing.
Because the framing defines the cavities and routing paths, the mechanical rough-in installs the plumbing, electrical, and HVAC systems that make the space habitable and safe. Trades coordinate sequentially: plumbing and ductwork first, then electrical wiring, to avoid conflicts. Pipes for supply, drainage, vents, and fixture locations are set and pressure-tested. Ducts are sized, insulated, sealed, and routed with vents and returns positioned for balanced airflow. Wiring includes outlets, switches, panels, and dedicated circuits, plus low-voltage runs for communications. Inspections occur before insulation and drywall. Tests verify plumbing pressures, electrical continuity and grounding, and HVAC airflow and refrigerant levels. Documentation records compliance, warranties, and maintenance needs. Proper rough-in reduces rework and guarantees systems function reliably.
| System | Key action | Verification |
| Plumbing | Pressure test pipes | Leak-free seals |
| Electrical | Route wiring, panels | Continuity, grounding |
| HVAC | Install ducts, units | Airflow, refrigerant |
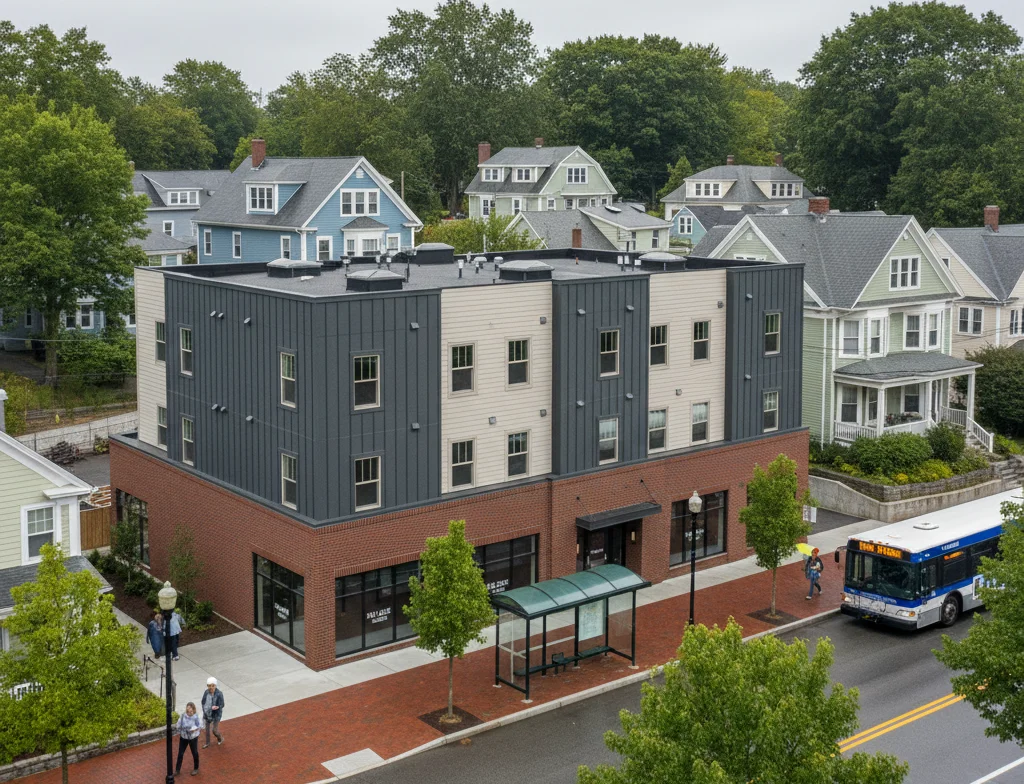
Finishes mark the transition from construction to a livable, maintained space and require deliberate choices that balance appearance, durability, and function. Finishes include flooring, wall treatments, tiles, exterior cladding, and paint, chosen for light, use, and maintenance. Inspections verify code compliance and finish quality at rough stages and at completion. Project handover formalizes completion, documentation, warranties, and a punch list for outstanding items.
The remodeling process moves from clear planning to final inspection in a series of defined steps. Goals, budget, and schedule guide decisions. Accurate measurements and a vetted design reduce change orders. Selecting materials and confirming specifications sets quality expectations. Demolition and framing prepare the structure, while plumbing, electrical, and HVAC installations create systems that must meet code. Finish work completes the space. Thorough inspections and a formal handover guarantee the project meets requirements and owner expectations.
We follow a step-by-step process that shows exactly how the process works from concept to completion. It starts with an initial consultation to understand goals and budget, followed by a site walkthrough to capture measurements and constraints for initial design. Our integrated design-build process then moves through the formal design process, aligning design and budget before construction begins. Your team communicates clearly throughout the construction process, hosts milestone reviews, and wraps with a thorough final walkthrough; only when the punch list is closed is the project is completed and construction is complete.
We start every home remodeling project with a written scope of work that becomes a detailed scope of work as decisions firm up. From there, we produce coordinated design plans and permit-ready construction drawings. In parallel, we guide design selections (fixtures, finishes, systems), capturing every design and material choice in writing with known lead times. Your dedicated interior designer curates the interior design to reflect your style preferences while preserving schedule and cost. The result is a documented project design package that lets you keep the construction predictable and helps avoid unexpected costs.
Duration and pricing vary depending on the complexity and complexity of the project, the stage of the home (occupied or vacant), and whether it’s a major home update, whole house remodeling, or focused area refresh within a whole house plan. Site conditions, permit routing, and scope changes all matter. A disciplined home renovation process and home remodeling process reduce risk, while realistic allowances protect cash flow on any renovation project.
You’ll have a seasoned project manager as your main point of contact and on-call point of contact for decisions and updates in the construction phase. Expect proactive project management with weekly touchpoints, photos, and checklists throughout the construction. Our field professionals will work cleanly and safely to keep your home protected while work proceeds.
If you’re a homeowner planning a home remodel or a larger remodeling project, we invite you to discuss your project and remodel your home with an integrated team that delivers both construction services and curated remodeling services. In our first meeting we review expectations for the project, the details of the project, target living space goals, and how new new space supports your dream home. We bring good design to life—literally—turning vision into a remodeled home and truly newly remodeled home with craftsmanship and attention to detail. That’s how we design to life and help you achieve a successful home you’ll love and want your home to be for years.
© 2025 Genesis Construction and Development - All rights reserved | Web Design & SEO By: Authority Solutions®